Photogrammetry has gone from a niche surveying technique to a staple of the modern game dev pipeline — and once you’ve pulled a real-world rock, prop, or ruined wall into Unreal Engine with sub-millimeter surface detail, it’s hard to go back to box-modelling everything by hand. Here’s a practical breakdown of how to do it right, from the first photo to a Nanite-ready mesh in UE5.
Capture: Getting Usable Source Photos
The quality of your scan lives and dies in the capture stage. No amount of post-processing recovers bad photos. A few hard rules:
- Overlap is everything. Aim for 70–80% overlap between adjacent shots. Your reconstruction software needs to triangulate the same surface point from multiple camera positions — give it options.
- Diffuse, even lighting. Harsh directional sunlight bakes shadows and highlights into your albedo and fools the depth solver. Overcast days are ideal outdoors. Indoors, use a ring light or bounce cards to kill specular.
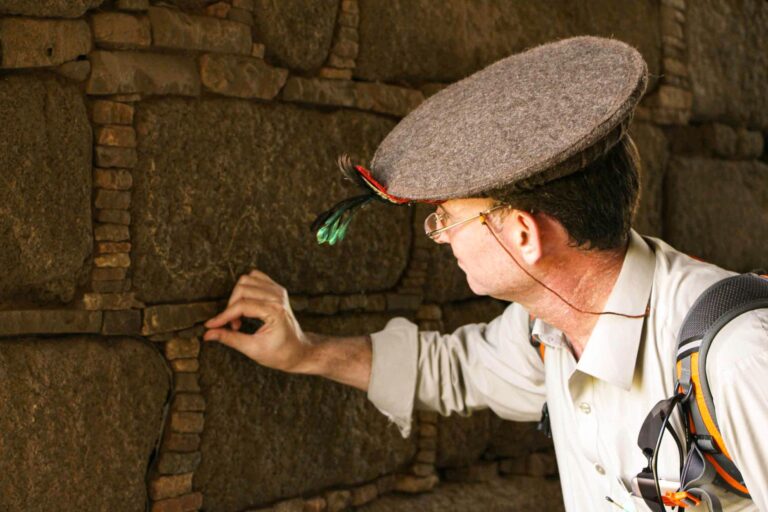
- Turntable vs. field capture. A motorised turntable with a fixed camera is the cleanest method for small objects — consistent distance, consistent light, repeatable angles. For large environmental assets (boulders, walls, tree trunks) you’re shooting in the field: walk a full orbit at each elevation band (eye level, 45°, near-vertical), then add a nadir pass for the top.
- Avoid reflective or translucent surfaces. Glass, wet paint, and polished chrome defeat photogrammetry. Dulling spray or chalk can help on small objects.
Software: RealityCapture, Metashape, and Meshroom
Three tools dominate the space, each with different trade-offs:
- RealityCapture (Epic Games) — The speed king. Alignment and dense reconstruction that takes hours in other tools completes in minutes. It’s free for non-commercial use under the PPI licensing model; commercial work is pay-per-export. The UE5 pipeline integration is tight for obvious reasons.
- Agisoft Metashape — Industry standard in archaeology, forensics, and film. More manual control over alignment settings, solid batch processing, and a mature Python API for automation. Slower than RealityCapture but extremely reliable.
- Meshroom (AliceVision) — Fully open source and free. The node graph UI is excellent for understanding the pipeline; quality is competitive with the paid tools on clean captures. Slower GPU utilisation and less polish, but nothing else comes close at zero cost.
For production work, RealityCapture is the practical choice. For learning the fundamentals, Meshroom’s transparent pipeline teaches you what’s actually happening at each stage.
Retopology and Texel Density
Raw photogrammetry output is a dense, unoptimised triangle soup — sometimes 20–50 million polygons for a single rock. You need a game-ready mesh. Options:
- Automatic decimation inside RealityCapture or Metashape gets you to a usable LOD0 quickly. Watch for UV seams collapsing and silhouette degradation around thin features.
- Manual retopology in ZBrush or Blender when the asset is hero-grade and will be seen up close. ZRemesher is fast; hand-retopo in Blender gives you control over edge flow.
- Texel density: Set a consistent target across your asset library — 1024 px/m is a common baseline for mid-range environment assets, 2048 px/m for hero props. Bake your high-poly colour, normal, roughness, and AO down to the retopologised mesh. Substance Painter or Marmoset Toolbag handle the bake cleanly.
Nanite in UE5: Why It Changes the Equation
Nanite virtualised geometry lets you import near-raw photogrammetry meshes — millions of polygons — and have the engine handle LOD automatically at runtime. For environment assets like rocks, rubble, and architectural surfaces this is a genuine pipeline shift: you skip most of the manual decimation work and go straight from RealityCapture output to the engine.
Enable Nanite on import (or retroactively via the Static Mesh Editor). A few gotchas: Nanite doesn’t support masked materials or two-sided geometry cleanly, and translucency is still handled conventionally. For foliage, use the traditional LOD/impostor pipeline. For hard-surface environment pieces, Nanite is almost always the right call.
Practical Tips From Production
- Shoot RAW if your camera supports it and convert to 16-bit TIFF before importing — the extra colour depth survives the texture bake better.
- Include a colour calibration card in your first and last shots so you can normalise exposure across a long capture session.
- Name your files with camera angle metadata before importing. It speeds up alignment significantly when the software knows roughly where each photo was taken.
- Scale your scene against a known reference object (a ruler, a brick with measured dimensions). Unscaled scans look fine until you drop them into a scene with a character and everything is inexplicably giant.
- Check your normal map tangent space settings match between your baking tool and UE5 — a mismatched setting gives you lighting that flips under certain angles.
Photogrammetry rewards a methodical approach. The capture stage is where most people cut corners and regret it later. Get that right and the rest of the pipeline — software, retopology, Nanite — is largely a matter of following a checklist.
Want to see more on the VFX and game dev side? Browse the full VFX & Game Dev archive for tutorials, breakdowns, and workflow guides.
Related reading from Sinfull Studios
- What Is Virtual Production? A Plain-English Guide for Filmmakers and Brands
- Greed Is a Pipeline: Why VFX and Game Dev Work Better Together
- Game Balancing: Data-Driven Tuning Without Killing the Fun
- VFX, Game Dev and Virtual Production in Regina
Based in Regina, Saskatchewan. Explore VFX, Game Dev and Virtual Production or request a quote from Sinfull Studios.